

Pre-approved overtime allows administrators to authorize overtime schedules in advance for selected employees within a specific date and time range.
Step 1: Go to Pre Approve Overtime
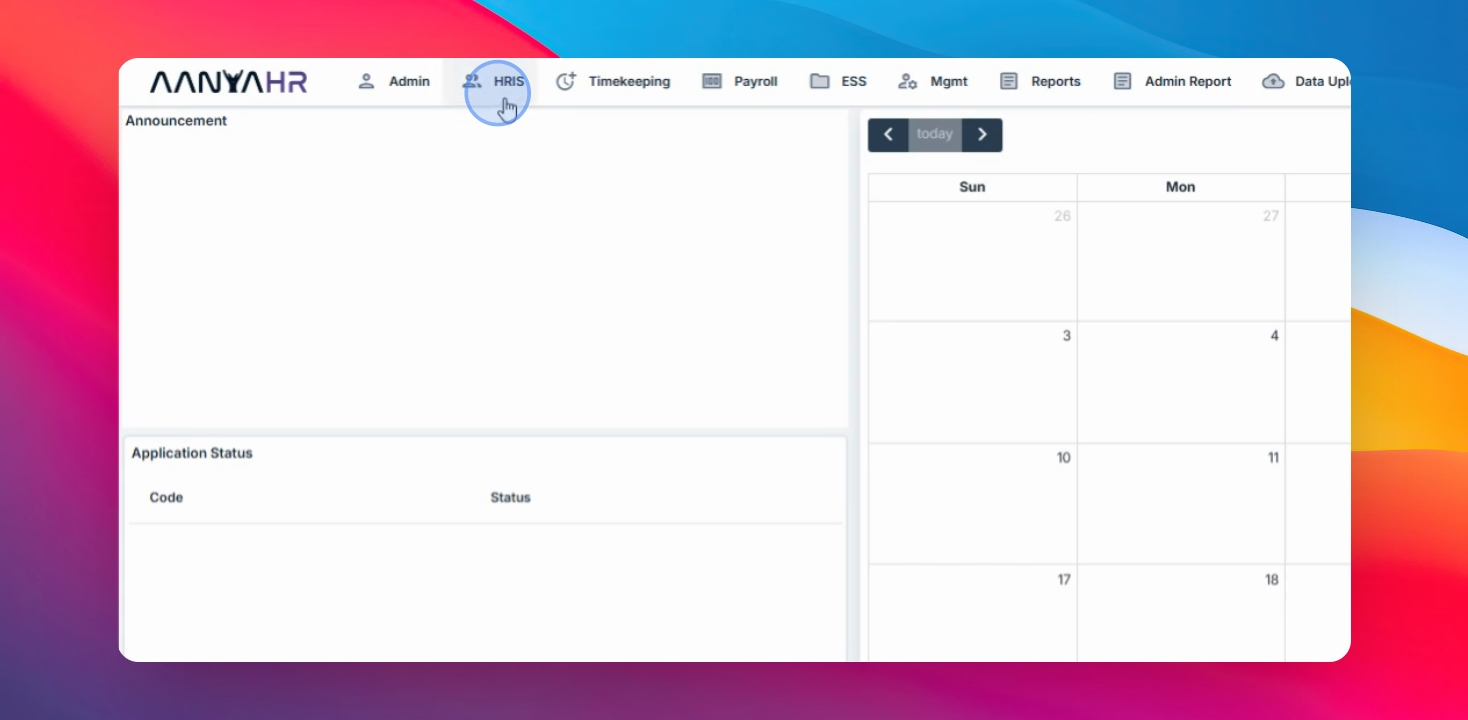
Navigate to the HRIS menu, select Admin filing, then choose Pre Approve Overtime.
Step 2: Start Creating Overtime
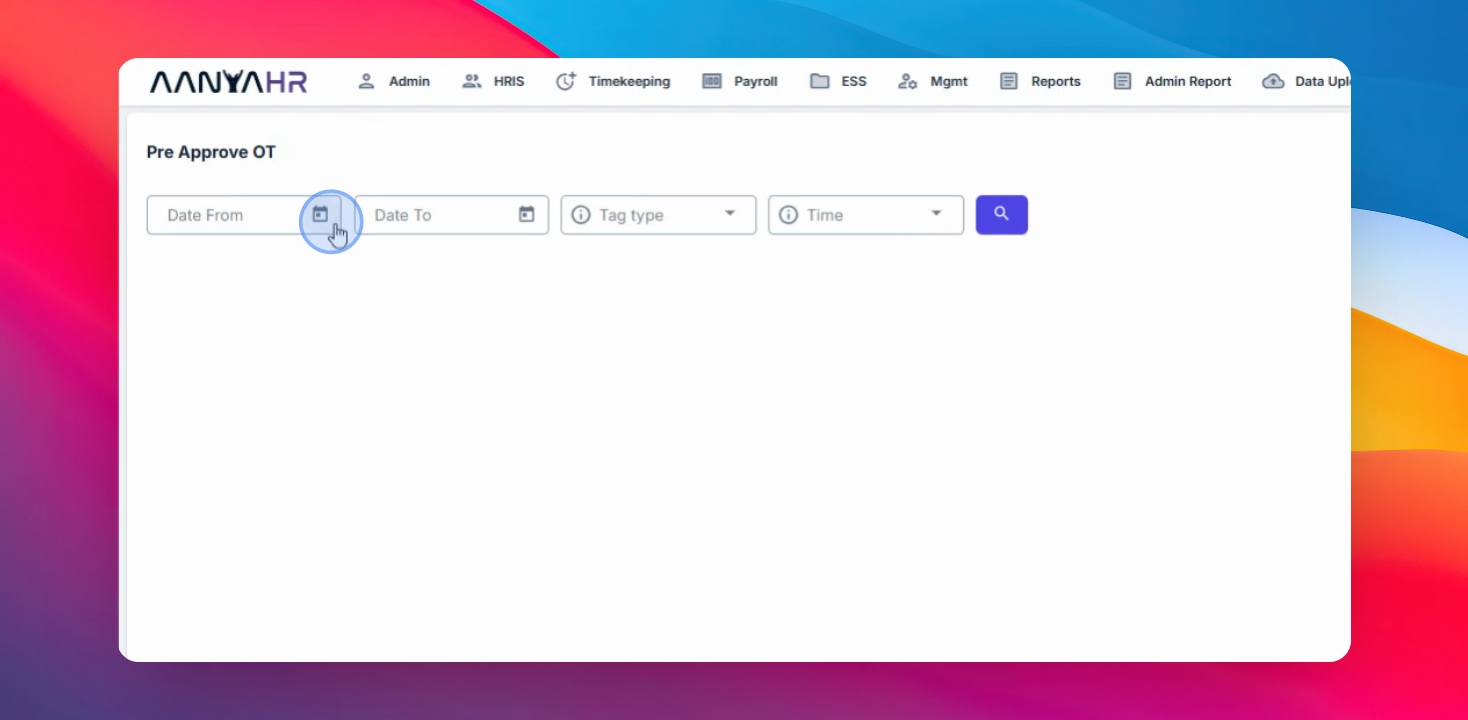
Click the Create button. Select the date range for your pre approved overtime.
Step 3: Filter Employees
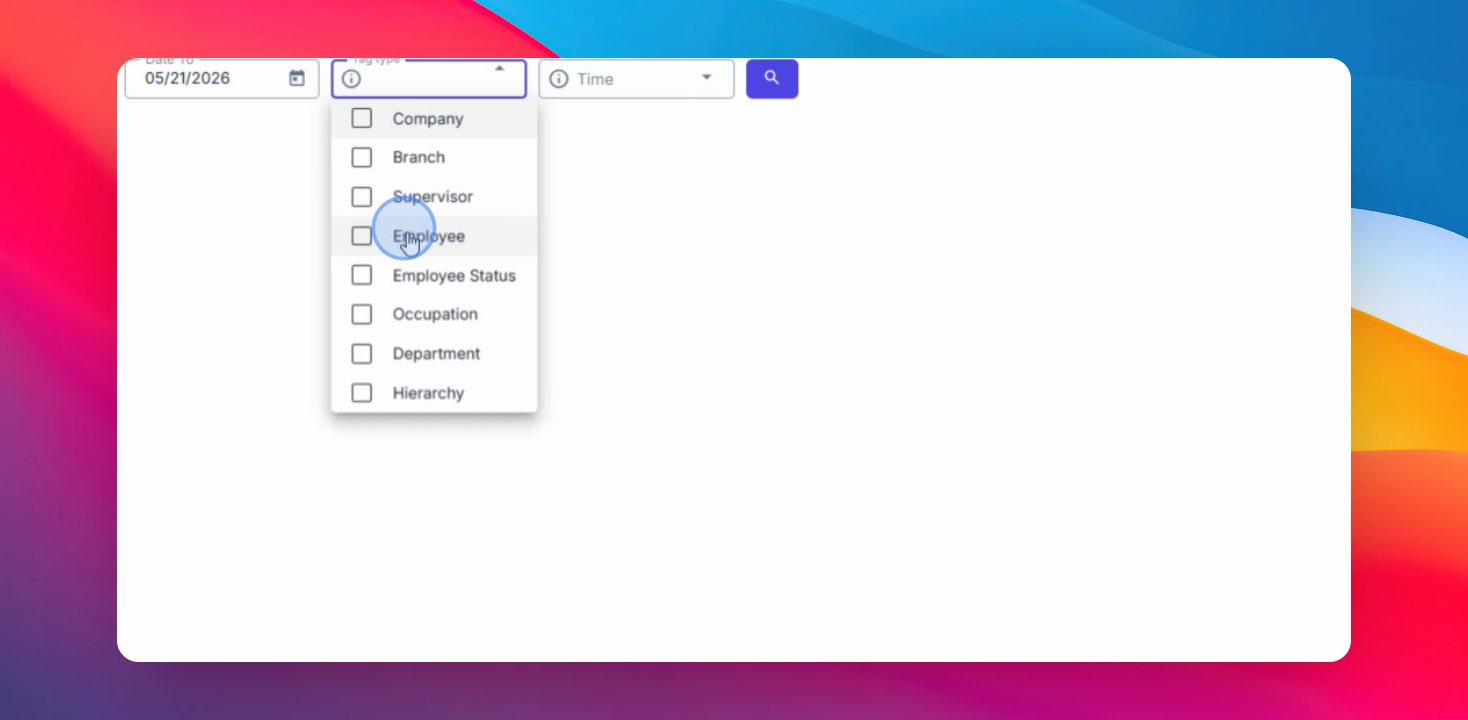
Use available filters to narrow down employees. You can also use the tag type to filter employees for better selection.
Step 4: Set Time Range and Search
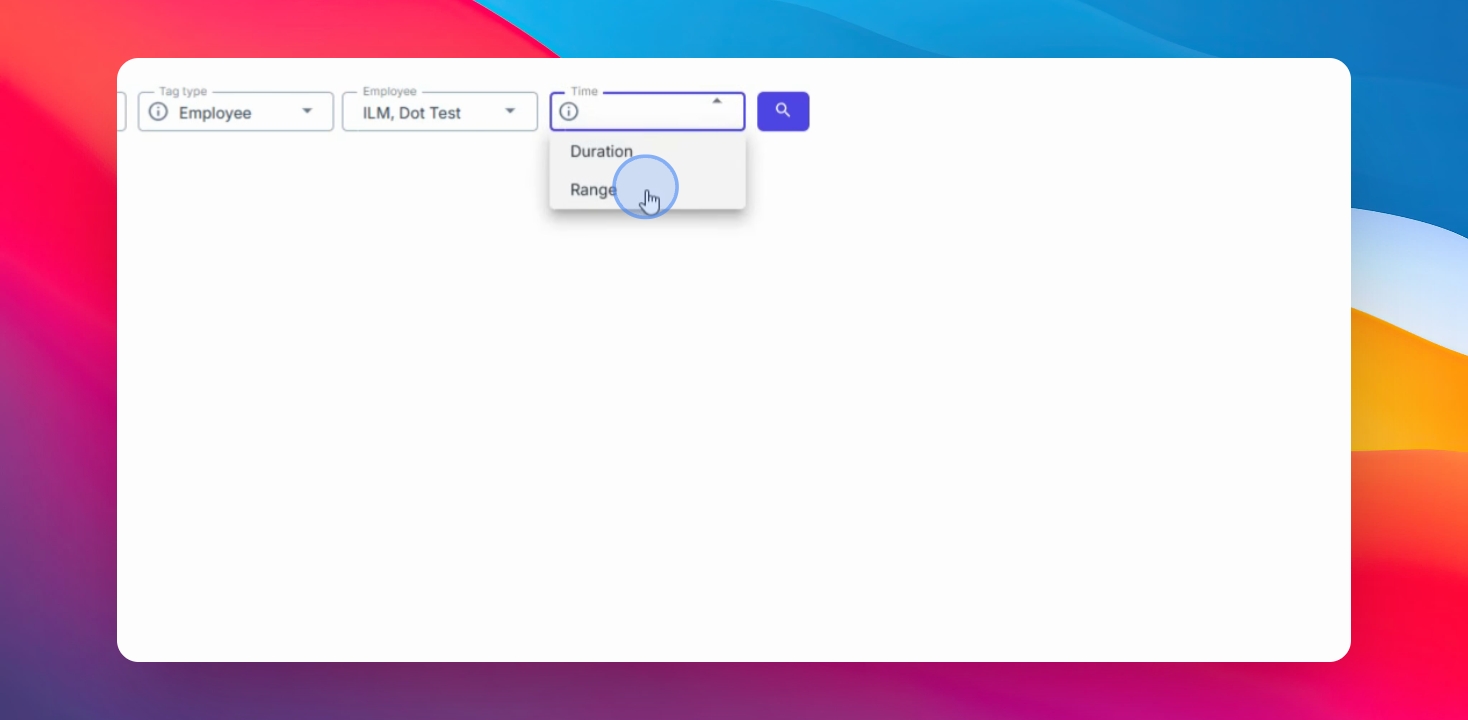
Select the range and click the Search button. The range helps identify the exact hours and time the employee will render overtime.
Step 5: Fill Out Overtime Details
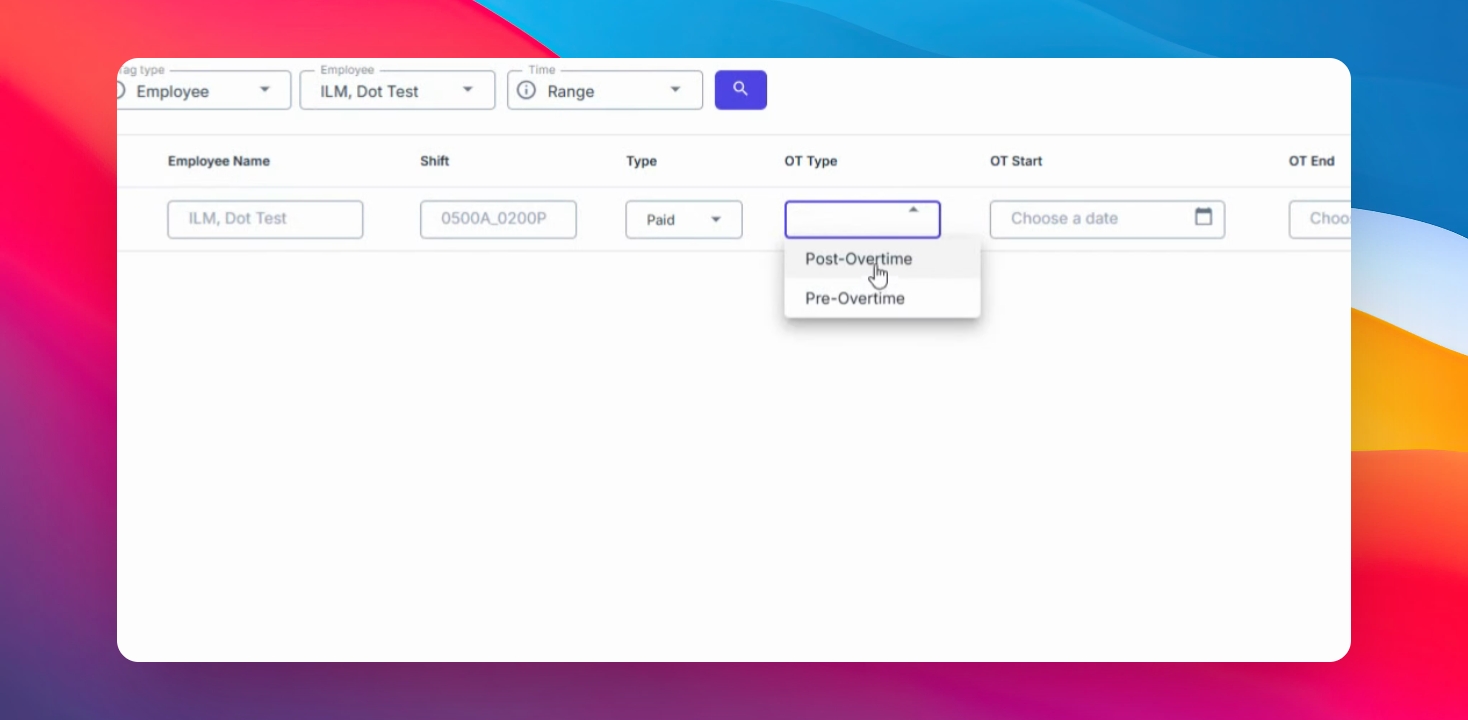
Fill out the required details. Choose the type (Offset or Paid), and select the OT type (Post overtime or Pre overtime). For example, select Post overtime as a sample.
Step 6: Set Overtime Schedule
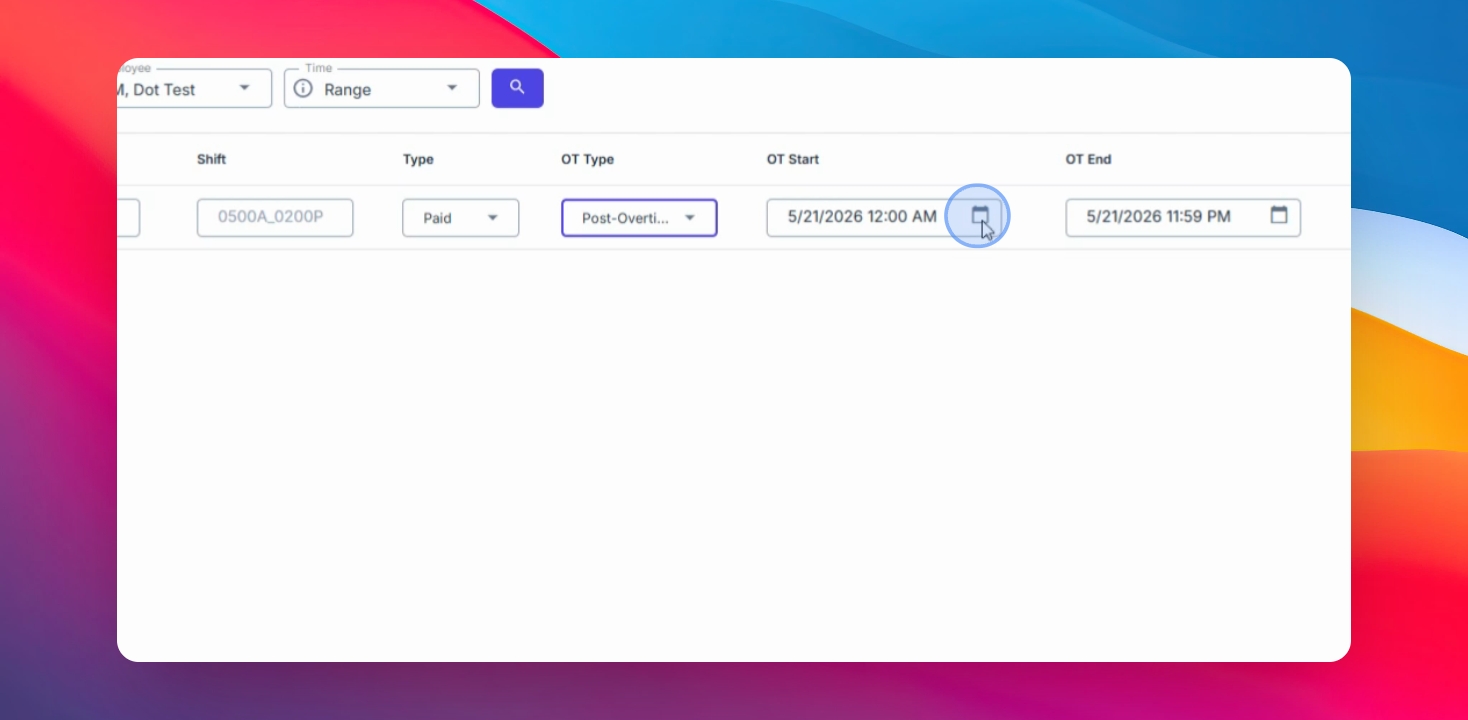
Select the overtime start time and end time.
Step 7: Save Changes
Click Save changes to proceed and finalize the pre approved overtime entry.