

Locking filing and approval helps control submission and approval deadlines before payroll processing.
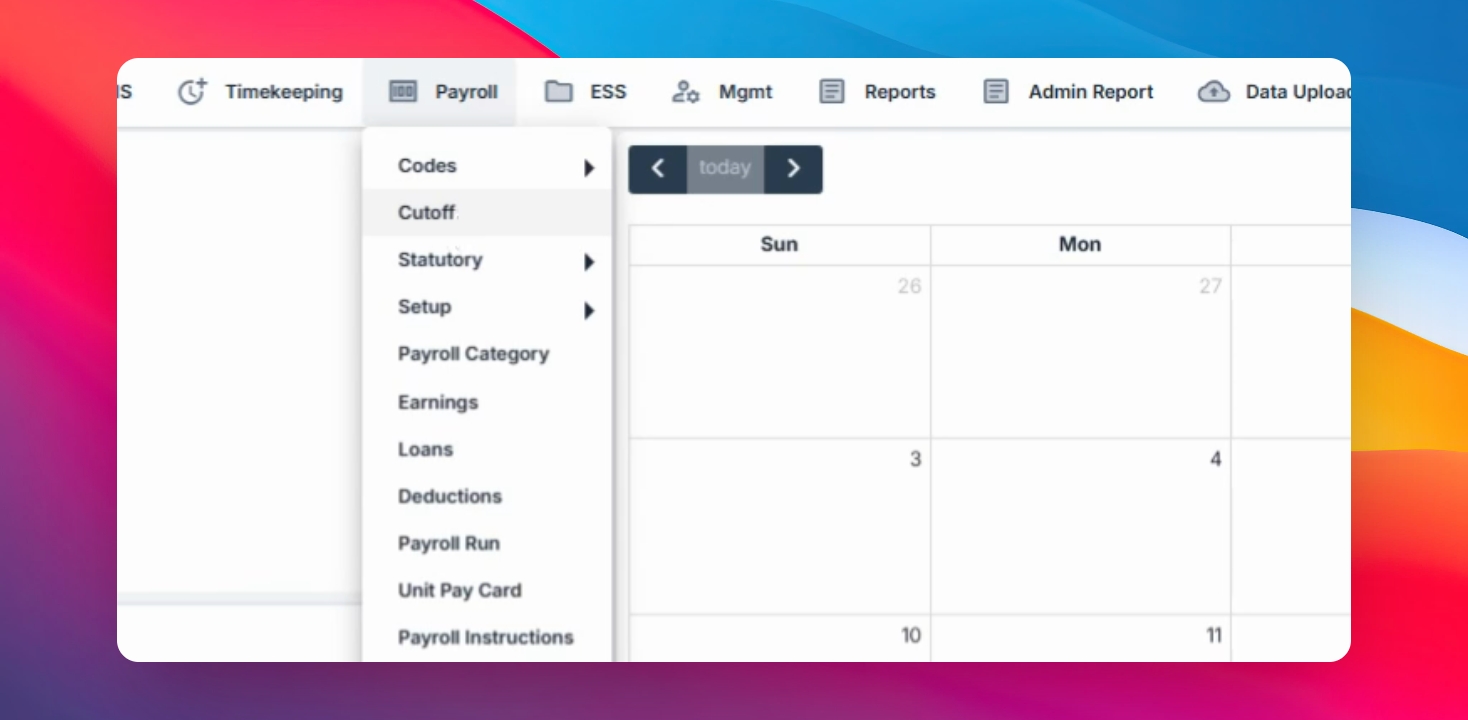
Step 1: Open the Payroll Cutoff Setup
Navigate to the Payroll menu, select the cutoff period, choose the correct cutoff, and ensure it is saved properly.
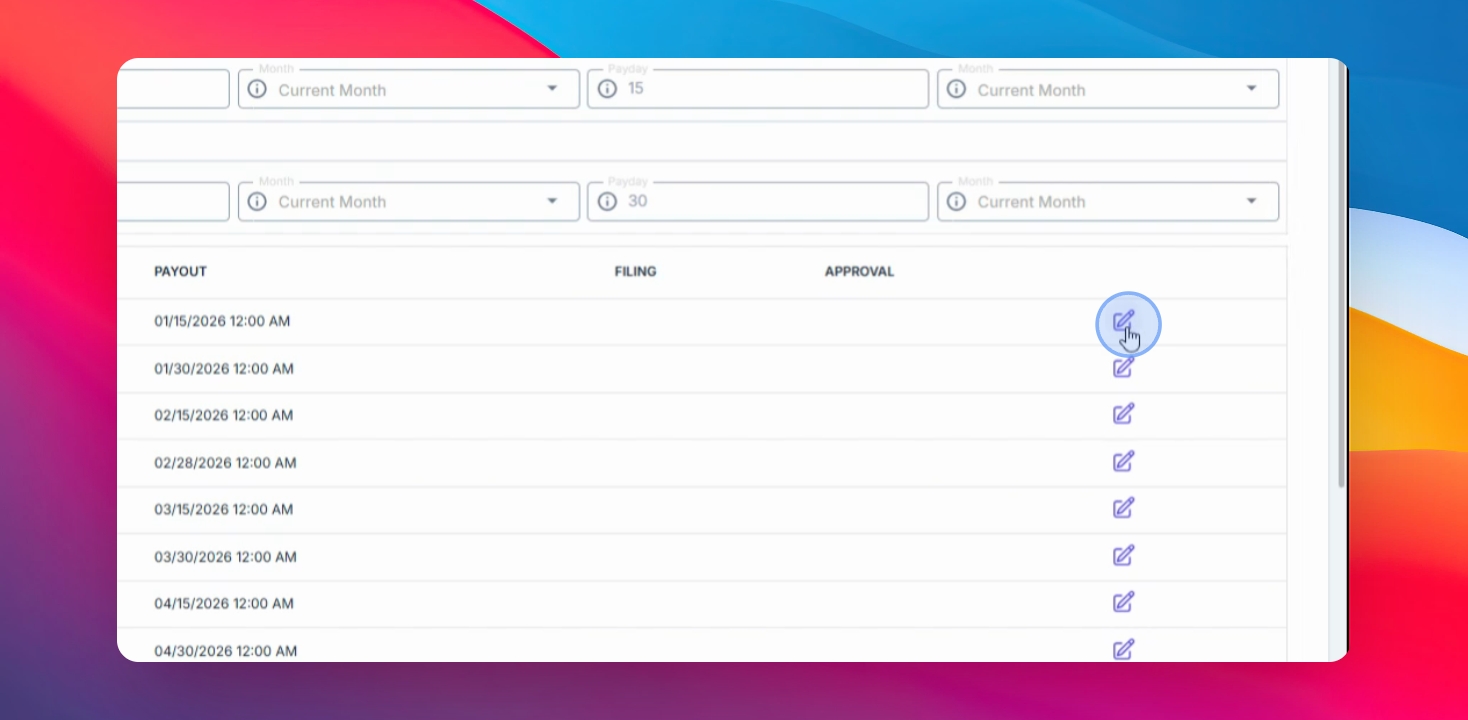
Step 2: Edit the Cutoff
Click the Edit button located at the rightmost part of the first cutoff of the year.
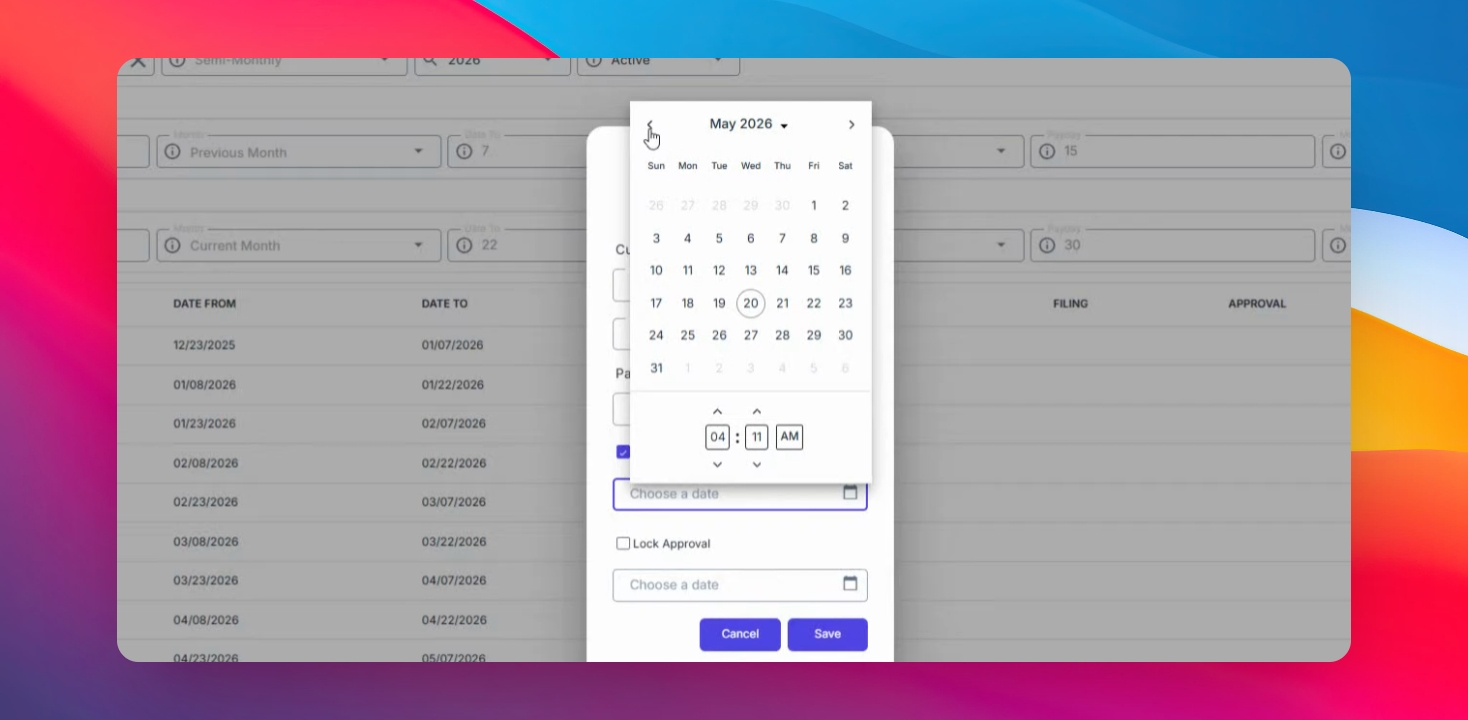
Step 3: Configure Filing Lock
Enable Lock Filing and select the preferred locking date and time.
For example:
If the cutoff period covers December 23 to January 7
You may set the filing lock date to January 8
Then specify the lock time, such as 12:00 PM
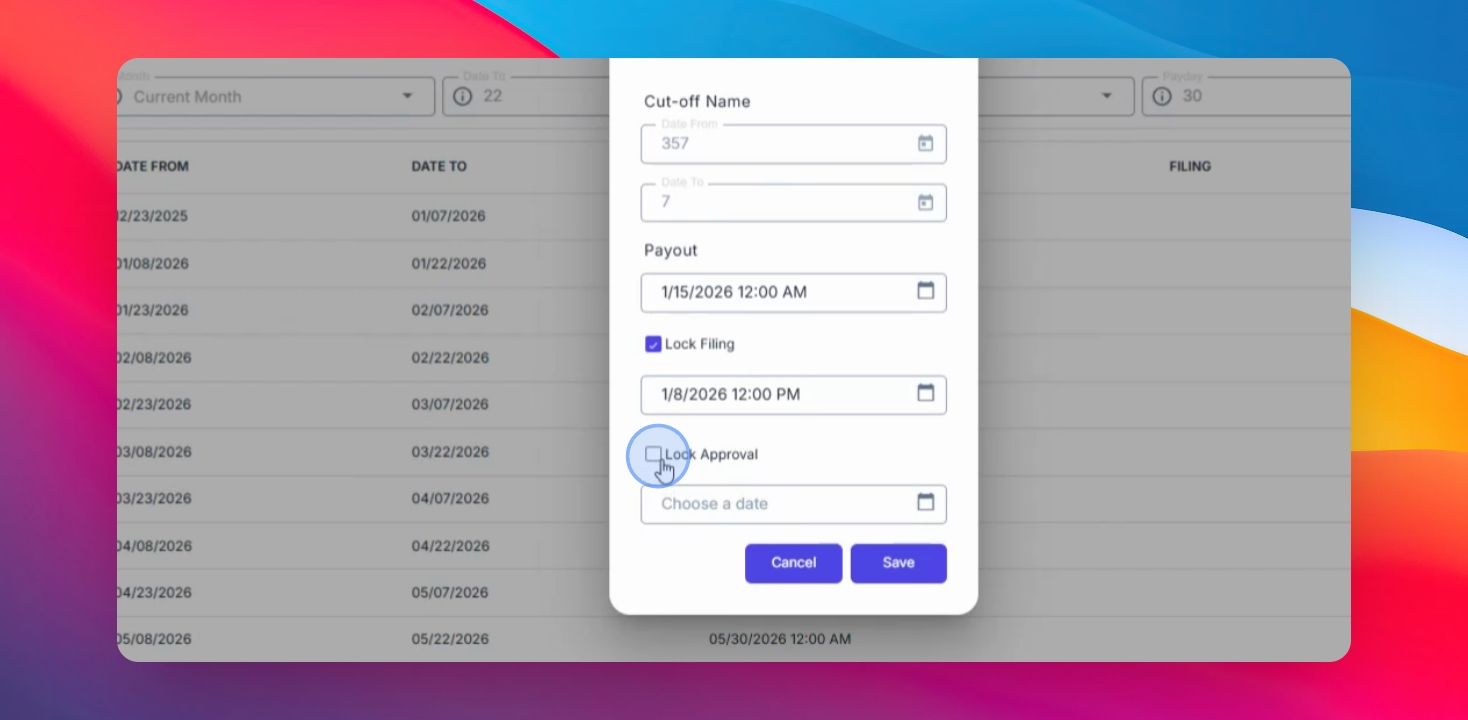
Step 4: Lock Approval
Enable Lock Approval and select the preferred approval lock date and time.You may use the same date as the filing lock but assign a different time.
Example:
Filing Lock: January 8 – 12:00 PM
Approval Lock: January 8 – 2:00 PM
It is recommended to schedule filing and approval locks either:
Before
After
your timekeeping process, depending on your payroll workflow.
Avoid setting lock schedules too far in advance to minimize unexpected issues, such as:
System maintenance
Payroll adjustments
Emergency corrections
Step 5: Save Changes
Once all settings are finalized, click Save Changes to apply the configuration. Repeat the same process for other payroll cutoffs as needed.
.
You have now learned how to configure Filing Lock and Approval Lock settings for payroll cutoffs. Proper lock scheduling helps maintain payroll accuracy and ensures filings and approvals are completed within the required timeline.